Compared to inbuilt microphone, camera microphone records better audio and features more functions. What is it? How to use it? Today let’s learn more information about it.
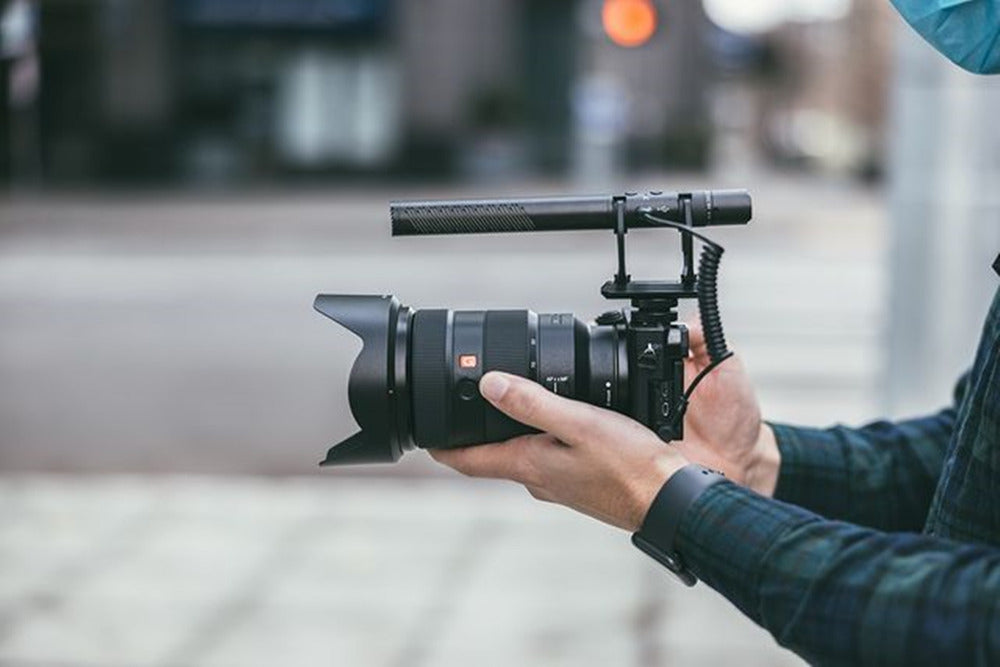
Photo by edwardleefilms
External camera microphone types explained
A camera microphone is a special kind of mic that’s been designed to work well with a camcorder or a video-enabled DSLR. It’s typically lightweight (to help keep the overall weight low), and often features the ability to mount to the shoe. Essentially, there are two types of microphones for camera that are widely used:
Camera shotgun microphone - Directional polar pattern works to reject ambient sounds
It is the most widely used type. It features directional polar pattern like cardioid and supercardioid, offering excellent audio solution to shooting.
Generally speaking, shotgun microphone for camera varies in length, including short shotgun mic which is usually mounted on the camera, and medium and long shotgun mic that usually needs a boom operator to help record the sound. You can use this camera microphone for vlogging and suchlike situations that blocking noise from side and back is a must.
Lav mic for camera - Clip on the clothing and stay unobtrusive
It is usually called lav mic, lapel mic. As the name suggests, it is able to be clipped on the clothing of the speaker with the other end plugging in the camera. Since it can stay incredibly close to the sound source and is often omnidirectional, it is the best camera microphone for YouTube, live streaming, etc.
In general, there are wired and wireless camera microphone to meet your shooting requirements.

Go and buy at Moman PhotoGears Store
Why DSLR camera microphone is needed: Better audio is provided
First of all, built-in microphones are notoriously poor performers. It is good to just record normal video. But if professional audio is required, it can not be relied on. As a result, external mic is designed to solve the problem.
Just now you know that mics come in different types and are good to various types of shooting, thus providing great convenience for you. According to the type of work you’re doing, it can help you pick up more realistic surrounding sounds or improve the clarity of dialog.
For example, our camera microphone M3 is high directional, so it is able to pick the target sound and block unwanted noise, making it ideal for interview and other situation asking for quiet recording. Moreover, its 3-level gain control plays a role when the audio signal is weak. Even in outdoor recording, it also performs well thanks to the shock mount and windscreen.
Here is the full review of SYNCO M3, a mini microphone for camera, you can watch the video and learn more about it.
Two steps to achieve camera microphone attachment
Since using an external microphone is of great help, how can you use it with your shooting devices? Here are two steps for you to follow.
Tell the DSLR camera microphone input

Before you look for an on camera microphone, it is really important to figure out what kind of mic input that the camera has.
In general, camera microphone uses either 1/8" (3.5mm) mini-plug jacks or XLR connectors to connect. Consumer camcorders, video-enabled DSLR, and smaller professional video cameras all have mini-plug inputs. This is the simplest method for attaching a microphone to a DSLR. It goes without saying that it is the best option for a beginner. The majority of DSLR have a 3.5mm jack connector for connecting typical setups. All you have to do now is plugging your microphone into the jack.
On medium and large professional video ones, XLR inputs are usually found in pairs. It looks like three little circles within a big one and is necessary if you want to record quality and balanced audio.
Pay attention, the microphone input on cameras is sometimes hidden behind discreet tiny doors. You’ll need to check the manual to see if the on camera microphone attachment is available. Some cameras have proprietary connectors buried inside the shoe that could connect to a dedicated auxiliary mic.
Learn how to connect microphone to camera
To connect the external camera microphone, all you have to do now is following these simple steps:
- If the cable is separate, connect it your mic. Once you hear the click sound, the connection is done.
- Then plug the other end to your camera. Still wait for the click sound.
- Check the connection and see whether the external mic records sounds or not.
- Finally just start your shooting.
The above method is feasible when your camera and microphone have the same connector. What if you purchase a XLR camera microphone and there is only 3.5mm jack in the camera? A camera microphone adapter plays a role.
- Screw the XLR cable adapter onto the bottom of the camera, the same way as you mount a tripod.
- Use a XLR cable to connect the microphone and adapter.
- Check the connection.
Go and buy at Moman PhotoGears Store
Tips to make your camera microphone sound better
Besides using professional digital camera microphone, there are other tips for you to make a high-quality video.
1. Plan the video ahead
You may prepare your editing ahead of time for your digital film shot by taking a few basic steps, and you won’t be caught off guard later. Therefore, it is feasible to try making shot lists. It can show you everything you need and ensure that you get everything ready, like the setting of microphone for video camera.
2. Check the setting
Before pressing the Record button, be sure you've covered all of the essentials. Set the white balance, tweak the exposure, and refocus. It's also crucial to take camera microphone test to ensure that the audio levels are within acceptable limits.
3. Editing
After you have finished the video shooting, you should edit the best clips and fit them together so viewers can enjoy a smooth and excellent video. There are many professional editing software like Premiere Pro, After Effects, First Cut Pro (FCP), and Cinema 4D. Also, there are some simple-used software. For example, iMovie is supplied for apple users.
4. Learn about the sharing platform
When it comes to sharing the video, YouTube is the most common used standard. So you need to learn about it. The followings are something you need to know.
- It accepts a wide range of file types and allows some of them to be uploaded in full HD, also known as 1080p.
- Unless you validate your account, your video can’t be more than 15 minutes.
- You can see the basic analytics about your video such as the number of page views, comments, and the number of “likes.”